Today’s blog is a serious topic. It’s about
something that I-20 holders want to know. This information has been personally
exchanged with the person responsible for the SEVIS.
Since last year, the SEVIS Field Associate
(responsible for our school) has regularly come to visit the campus several
times. They come to share the latest rules and visa information regarding the
SEVIS, and to check that our school isn’t unusual at the same time.
Aside from that, the one question that we
are often asked by students is:
“Will I be able to get the 60 days Grace Period?”
The Grace Period is a sixty-day legal stay
within the country following the completion of your program. During this time,
a student must either transfer to another school, or leave the United States.
The one thing that students on an F1 visa tend to get incorrect is that they will automatically be entitled to the 60 days Grace Period if they hold a valid I-20. This is wrong.
Not everyone is entitled to the sixty-day
legal stay. To receive the Grace Period, a student must meet the requirements
outlined below.
Properly complete their program → this means they complete their program without failing, and while meeting the appropriate attendance rates.
For example, a student has enrolled in a twelve-week program. Imagine they have now transferred to another school in the middle of the program. This transfer is possible, but it means they haven’t completed their program in this case (since they have transferred) and are not entitled to the 60 days Grace Period.
In this particular case, the student has a
15-day legal stay within the country. During this time, they must either leave
the United States, or complete the transfer process to the new school and begin
their next program from the earliest possible start date.
If a student’s attendance is insufficient, and their I-20 is terminated by the school, they must leave the United States immediately.
As for transfers, the SEVIS advises that it doesn’t mean “It would be good to complete the transfer process within the 60 days, and start the program at your next school”, but rather, “If you want to transfer during the Grace Period, you should finish the application process promptly and start your new program from the earliest possible start date.”
It is vital for students staying in the
country on an F1 visa to take personal responsibility for maintaining their
status. (Especially regarding attendance)
Students who come to America on an ETSA are
able to stay for 90 days. Staying any longer than this will be an illegal stay
and this will remain on their record.
It is highly likely that applications for
visas from people with a record of illegal stays will be rejected. Please take
plenty of care.
Transfers between language schools are popular within America. As mentioned previously in this blog, it is possible for the transfer process to be completed by the student themselves.
■Transfer Process
Before the conclusion of your program, decide whether to extend the program at your current school or transfer to another
If you decide to transfer, choose the school you will transfer to
Proceed with the enrollment process of the school you will transfer to (fill in application forms, make payments etc; please follow the school’s procedure)
Submit required documents to your current school
Your current school moves your SEVIS record to your next school
This isn’t a difficult process, but some troubles have occurred from time to time.
■Astudent has forgotten to submit the documents, and their status changed to ‘Complete’.
The documents required to move your SEVIS record to the next school are the ‘Transfer Form’ and the ‘Acceptance Letter’ for the school you are transferring to.
The issues that occurred in a certain case are related to this.
A student who had completed their program submitted a ‘transfer form’. The staff filled out all the necessary information and handed the form back to the student. Despite being urged to submit the acceptance letter prior to the final day, it was not submitted. More than sixty days passed following the end of the student’s program, and their status changed to ‘Complete’.
As previously mentioned in this blog, in the sixty days following the end of your program date (in the case of our school, the last day of your I-20 validity is the end date of your program) you will enter a Grace Period. Students must either transfer schools during this period or leave the United States.
The SEVIS status will automatically switch from ‘Active’ to ‘Complete’ on the 61st day. Once a status has become ‘Complete’, the school can do nothing more. You need to leave the US immediately.
■Why is the transfer process incomplete without an ‘Acceptance Letter’?
Most schools mention the following warning on their ‘transfer forms’:
“Please do not release the student’s SEVIS record to us until our school DSO has confirmed acceptance of the student via a written Letter of Acceptance. This transfer Verification form is not a confirmation of acceptance.”
According to this warning, your current school cannot send your record to them unless both your ‘acceptance letter’ and ‘transfer form’ are complete.
Even if you complete your enrollment form and payment of fees, and the transfer process has been completed at the school you’re transferring into, whether or not your record is transferred depends on whether or not your documentation has been submitted properly.
At each school’s discretion, if a student’s SEVIS record has not been transferred despite completing the transfer process, the school may be able to contact the previous school and check the issue. However, not all schools will go that far.
NYEA takes a lot of admissions from other schools. After completing the enrollment process with us, we issue an ‘acceptance letter’ and we always ensure to send the ‘transfer form’ and ‘acceptance letter’ to the school the student is transferring from. We will contact the previous school in cases where the record has not been sent to us.
The transfer process is not difficult, but it’s a good idea to confirm the steps with the staff at your current or future school.
There are quite a few choices as to what
you should do with your cell phone while studying abroad. Which option is best
depends largely on the length of your studies, so let’s take a look at the
following before deciding.
For Short-Term Studies Abroad:
Option 1: Use your smartphone to connect to the free Wi-Fi at
schools, accommodation and within stations.
New York is
implementing free public Wi-Fi, so you will be able to use the internet at many
different places like libraries, stations, parks and traffic intersections.
Also, many cafes and fast food restaurants offer Wi-Fi as part of their
service. However, services such as these are not always high speed. One option
is to purchase a mobile Wi-Fi router.
** If you don’t
switch off your mobile data, international charges will apply**
Option 2: Use your local telco’s
always-connected overseas internet service
If choosing the
option to use an overseas internet service provided by your local company,
please contact the telco before coming to the United States.
Mobile Wi-Fi routers:
Local carriers provide prepaid services.
These are quite affordable, but their expiration dates are usually only a few
months. They are suitable for short-term studies but may not be useful for
long-term studies.
In America, it is possible to purchase
prepaid Wi-Fi routers with indefinite expiration dates. (e.g. Internet on the
Go)
It’s best to buy these along with a usage
fee voucher. The cost is split into two types: one for fixed-term expiration
and the other for indefinite expiration. The price also differs according to
capacity (around $10 to $50).
Example: $25 for 3GB with a 30-day expiry,
or 1.5GB with no expiry
For Long-Term Studies Abroad:
What do I do about the cell phone I use in my country?
Regarding your cell phone, you may cancel your current contract, or you may alter your plan, and have it placed on hold. In short, if you pay the minimum costs while you’re studying abroad, you can then return to your original plan after returning home. The companies au, Docomo and Softbank all offer a service to put your contract on hold without paying the hundreds of yen cancellation fee. With this option, there is no breach of contract fee, so it may be better than cancelling while you’re overseas. Please contact your telco for more information.
Option 1: Purchase a cell phone within the United States
Purchase both a
cell phone and a SIM card at your destination.
It is important
to note that if you set up a new cell phone, you won’t be able to let your
family members know your contact details etc. in advance. If you purchase a
device locally, all the instructions and information will be in English.
(*There is a service called “h2o by KDDI” to set up a cell phone and issue a phone number prior to leaving the country. Please contact us for more details.)
1. Purchase a pre-paid type cell phone that you can pay before using
You can buy
pre-paid phones if you have the payment fee and personal ID.
The best thing
about this type of service is that it does not require a contract, so you can
cancel it at any time you like. However, there are initial costs to purchase
the device. (The full price of the cell phone is paid at the time of purchase,
and this can vary from $50 to $800 depending on the device.) You purchase a SIM
card at the same time as the cell phone. Since there is important information
and numbers on the packaging of your cell phone and SIM card, we recommend that
you keep these and do not throw them away.
The major
American telco are:
Verizon
AT&T
Sprint
T mobile
Metro PCS, Virgin Mobile (specializing in prepaid)
Metro PCS and
Virgin Mobile specialize in prepaid services and are cheaper than the other
major companies, but they may not receive good signal in the suburban areas.
We recommend
pre-paid services since students without a social security number or a bank
account can easily use them.
Payments are
made from your own online accounts.
2. Purchase a
post-paid type cell phone
This is a regular contract type. Cancellations during the contract period will incur penalty fees. Since you will be required to show your social security number and other information, this isn’t convenient for students without a social security number.
Option 2: Unlock the SIM for your cell phone, and only purchase a SIM card in America
Insert and use the
purchased SIM card
If you’d like to use this
method, please contact your current telco.
To be able to use your
phone for this, the following conditions must be met:
1) The cell phone must
have been sold after May 2015
2) The period of use must
satisfy the minimum requirements for the telco
3) The cell phone must be
compatible with US frequencies
SIM unlocking your phone
is not always possible, depending on how long you have been using the phone.
Please ensure you unlock your phone at the specific company’s store or through
the support site. Some stores will charge fees of 1000-3000yen to do this for
you. Cheaper smartphones may be able to be SIM unlocked, but they also may not
support US frequencies.
Check that your phone is a
compatible model, and if there are no issues, purchase the correct SIM type for
your phone after arriving in the country.
Please note the following
points:
The type of SIM card differs depending on the model of Android, iPhone etc.
There may be difficulties connecting to US signals
SIM Cards:
A SIM card is a
card which holds information like your phone number etc, and once purchased, is
inserted into your device. In other words, a cell phone is unusable without a
SIM card. Up until recently, telco companies issued their own individual SIM cards
and set them to read only specific information (SIM lock). This made it
impossible for customers to switch to other companies.
In 2015, the
Ministry of Internal Affairs and Communications instructed all telco companies
to enable SIM unlocking, so now it has become possible to do so.
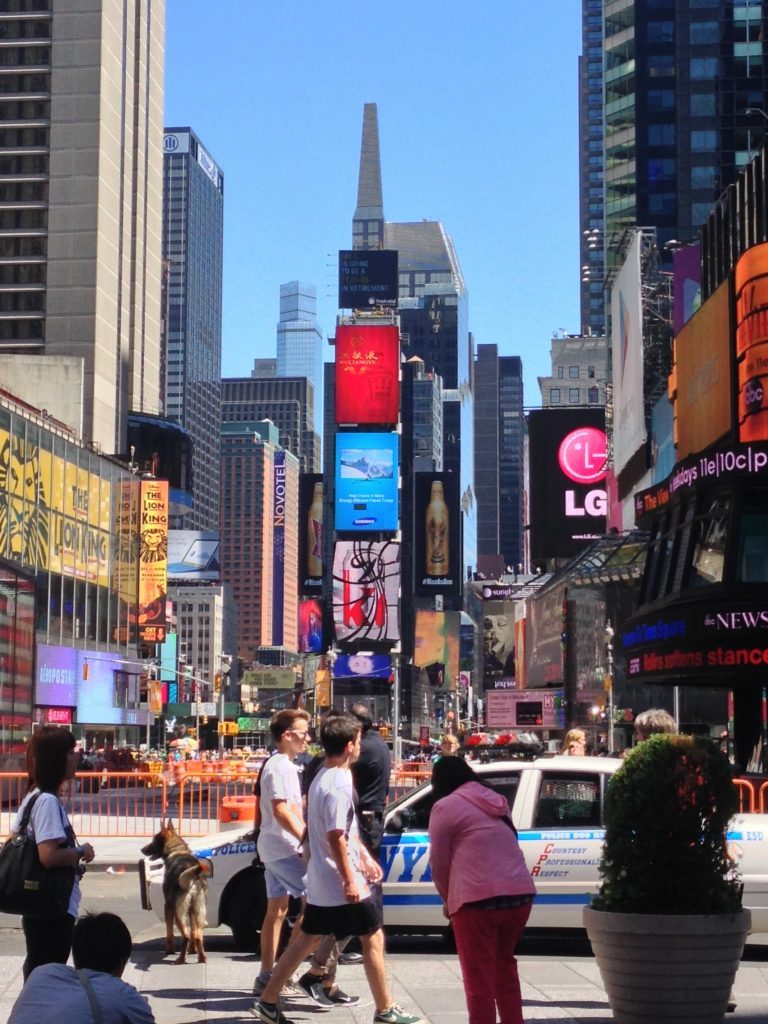
New York Wi-Fi
New York is one of the advanced internet
environments in the world.
In Manhattan, LinkNYC (a New York project
to replace the unused public payphones with public Wi-Fi) is everywhere. The
speeds are a decent 200Mbps.
To use LinkNYC, select “LinkNYC” from the
list of available Wi-Fi on your phone, then register your email address. The
certificate will be installed, and you will be able to use the internet
service.
In the subways, a free Wi-Fi service called
“TransitWirelessFree” is provided. Most buses do not provide Wi-Fi, but some
buses that run in the Bronx and in Queens do. Charging is usually possible.
There is free Wi-Fi on the NYC Ferry.
Additionally, free Wi-Fi is available all over the place, such as in cafes,
hotels, restaurants, museums etc.
Although the internet services in New York
are progressing, if you’d rather have easy access to the internet without
hassle, we recommend renting Wi-Fi or acquiring a cell phone in the United
States.
American Cell Phone Information:
In some countries, a fee is charged for
making a call, but not receiving calls. In the United States, fees are charges
both for making and receiving calls.
In the US, the contract would be “charges
for 0 minutes’ talk and 0GB of data”.
Please remember that if the person who
calls you talks for a long time, you will also be charges as the receiver of
the call.
Each situation is different depending on
whether your study abroad plans are long-term or short-term so consider all
your options before deciding what to do. Furthermore, ensure you contact your
current telco company.
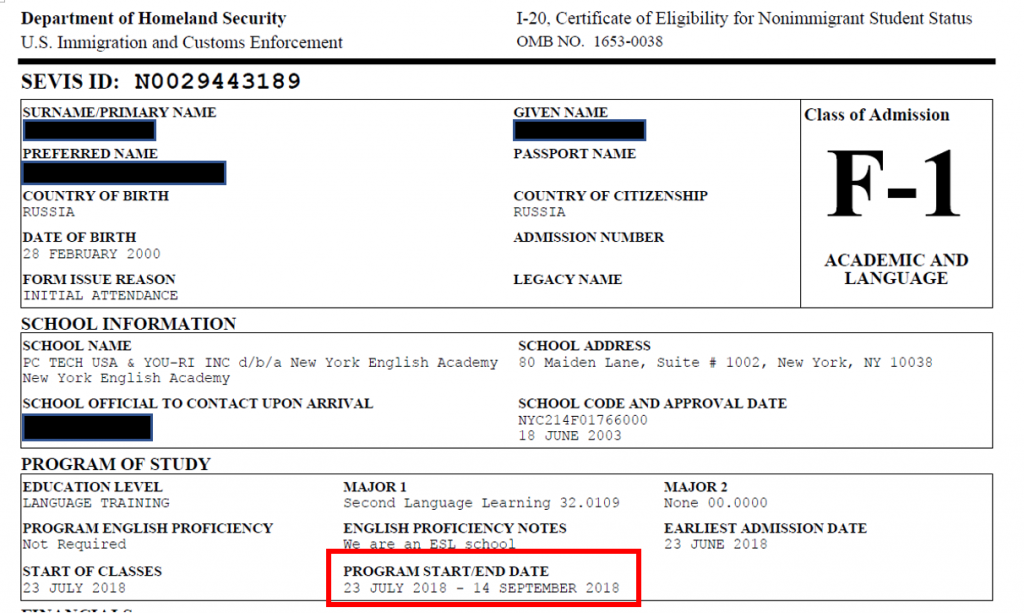
As long as your student visa remains valid (even if your I-20 has expired) your stay in America may be mistakenly considered a legal stay.
The I-20 form is attached to the F1 visa. Your I-20 must be valid for the duration of your study. The validity period is stated on the first page of the I-20 form.
The validity period of your visa is stamped on the visa page.
These two periods of validity are not necessarily limited to one another.
Let’s consider an example where the student has enrolled in a six-month program. The I-20 document states a validity period of 6 months; however, the F1 visa has been approved for a period of 5 years.
*There may be some cases where schools allow a validity period of one year or more even for a six-month enrolment. Each school’s policy differs on this*
The most important thing for students holding an F1 visa is to ensure that they also have a valid I-20. If the validity period expires on their I-20, they must do one of the following:
Transfer into a different school within 60 days from your current program ending date
Leave the United States within 60 days from your current program ending date
Have the I-20 renewed at the current school (this may or may not be possible)
The abovementioned 60 days are referred to as a “grace period”. If a student completes a program at their enrolled school, they will receive a legal-stay period of 60 days.
In cases students are terminated by the school with some reasons, then they do not receive this 60-day period and they may be unable to transfer to another school.
If, during the 60-day grace period, a student does not go through the procedure to transfer schools and remains within the US, their stay will become an illegal one.
In cases where a student’s program has finished but they wish to continue their studies in the US, we ask that they extend their program and acquire an extension of their I-20 from their school. Students should always ensure that they personally retain their currently valid I-20.
The extension procedure at the New York English Academy is as follows:
Complete the application form for the next program
Prepare the certificate of bank balance
Pay the fees for the next program
Even if your visa expires while you are residing in the United States, as long as you hold a valid I-20 your stay will be a legal one. It will not become an illegal stay.
However, if you temporarily leave the country and re-enter, you will require a valid visa and will need to go through the visa extension procedures.
It is not possible for students to extend their visa within America, so they will be required to do so from outside the country or from their home country. Please contact your individual schools for the documents necessary for a visa extension application. The New York English Academy will assist you with any documents required to avoid any issues with your visa extension, including your transcripts and a support letter from the school.
Entry into other countries basically
requires both a visa and a passport.
The first thing that is essential for
passage into a foreign country is a passport. Without a passport, you will be
unable to leave Japan. However, even though you’re able to leave Japan with
just a passport, you may not be able to enter other countries. A “visa” is a
document which allows entry to specific foreign countries, like an entry
permit. Once a visa is issued, it is attached to your passport.
Visas are split into many different types. We
will be explaining the different kinds of American visas. The two main
categories are “Non-immigrant Visas” and “Immigrant Visas”.
A Non-immigrant Visa is a visa that allows you to stay in the United States for a
specified period of time to accomplish a specified purpose. This is applicable
for those who are tourists, students, businesspeople or special workers etc.
An Immigrant Visa is a permit to allow you to reside in the United States on a Green
Card or after applying to be an American citizen.
Usually, those studying abroad will be
under the “Non-Immigrant Visa” category. Non-Immigrant Visas are divided into
various types according to the purpose of the traveller.
Commercial/Tourist Visa (B1/B2 Visa): Short-term entry visas for business, travel or medical treatment
purposes.
Employment Visa (H1, L, O, P, Q Visa
etc): Visas that permit legal employment. These are
visas for working within the United States. Depending on the type of work,
these visas are split into different types; e.g. special skilled laborers,
internal transfers, artists, entertainers, athletes etc.
Student Visa (F1/M1 Visa): Visas for studying abroad.
Exchange Visitor Visa (J Visa): A visa for those participating in exchange programs such as training
programs and internships etc.
Transit/Cruise Visa (C/D Visa): Visas for the staff and crew of planes and ships entering and
landing in America.
Religious Activist Visa (R Visa): A visa for those undergoing religious activities.
Employee Visa (B, A, G Visa etc): Visas for those travelling with an employer; these are divided
according to the visa status of the employer. This applies to people such as
butlers, drivers, housekeepers, assistants, gardeners, diplomats and government
officials etc.
Press Visa (I Visa): A visa for news media (who are based in foreign countries) to
temporarily stay in the United States.
Treaty Trader/Investor Visa (E Visa): A visa for residents of countries that have treaties and investments
with America.
Spouse Visa (K Visa): A visa for those who are engaged to a U.S. citizen and wish to gain
permanent residency in America.
You will need a visa that matches the
purpose of your stay in the United States.
Generally, to study abroad, apply for a
Student Visa (F1 or M1 Visa).
All visas have specific accompanied
documents.
For example, the J Visa has the DS-2019
document, and the H Visa has the I-129 document. In the case of the student
visas, this document is called the I-20 form.
Both the F1 and the M1 are Student
Visas.
For general university and language school
studies, you’ll need the F1 Visa. For specific professional studies or
training, computing, IT classes etc, you’ll need the M1 Visa. Students who
attend the New York English Academy will have an F1 Visa.
When entering the United States, you
must go through Immigration. (Specific to the JFK airport)
The procedure for entering the United
States is as follows:
Arrival of the plane
Immigration
Baggage collection
Customs
Airport arrival lobby
Go through Immigration once your plane has
landed. This will be split up into two lanes, one for American residents and
one for foreign residents. Line up in the lane for Non-US Citizens.
Immigration at the JFK Airport in New
York City has kiosks. (Some other airports may not have kiosks)
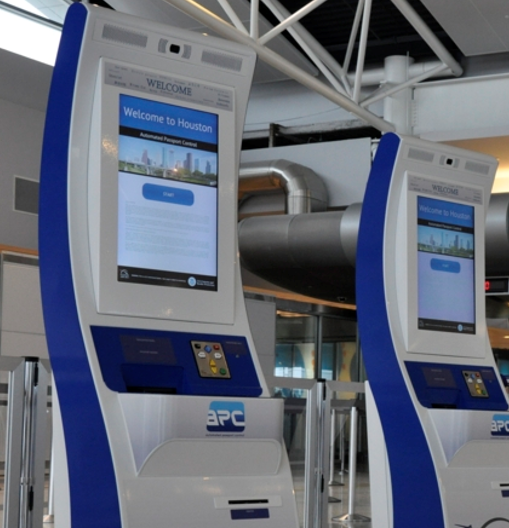
The John F. Kennedy Airport is a large
airport which serves as the gateway to the East Coast of the United States, with
many international visitors. The “APC KIOSK”, or Automatic Passport Control
Kiosk, has been implemented to cut down on immigration.
<Immigrants who can use the
kiosks> Those who can use the kiosks do not need
a customs declaration form.
People who have an ESTA and
have entered the U.S. after 2008
U.S. citizens
Permanent residents of the U.S.
Canadian citizens
<Immigrants who cannot use the
kiosks>
People entering for the first time with an ESTA
People who have entered with an ESTA after 2008 but have renewed
their passport
People on a student or work visa
People who have been directed by personnel to use the immigration
desk
[Using the Kiosks]
Choose your language
Scan your passport on the screen
Answer the U.S. Customs questions
Answer ‘yes or no’ for ESTA registration
Fingerprint scan
Photo taken
Confirm travel companions
Confirm arrival flight information
Once everything has been completed, a
receipt will be printed, and you will need to line up for Immigration. This is
a simple lane just for showing your documents, and it means there are no issues
with your entry. However, if there is a cross on the printed receipt, you will
need to proceed to the same in-person immigration examination as other visa
holders.
Sometimes this cross is displayed if your
photo or fingerprints are not taken correctly.
Immigration Procedures
For immigration, you will need a passport
containing the correct visa, and the accompanying documents for that specific
visa. (In the case of a Student Visa, the I-20 form). Submit these to the
immigration officer.
Having a visa does not necessarily mean you
can enter the country. The immigration officer will allow your entry by
checking your visa type, your purpose for visiting, and whether or not your
documents have expired. At this time, the immigration officer may ask you some
questions.
Purpose of visit
How much money you have
How long you plan to stay
Where you will be staying
If nothing is checked, the immigration
procedure is over. If there are any issues or some of your documents are
missing, more checks will be necessary, and you will be led into a separate
room. This procedure will take a considerable amount of time, so please ensure
your documents are completed prior to immigration.
Please refer to the following video for an
explanation.
Please note that circumstances and
procedures will differ with each airport.
Once you have gone through Immigration,
collect your luggage and proceed to your destination. The New York English
Academy offers “First-Day Immigration Support” as an option. There is also a
pick-up service to take you to your accommodation.
*First-Day Immigration Support: We will
pick you up from the airport and take you to your accommodation. Once you have
dropped off your belongings, we will show you around the facilities and areas
you will be using during your time here. This is the recommended option for
those coming to New York for the first time.
List of Useful Things for Studying Abroad (Long-term studies, short-term studies, things useful for the year)
Ear cleaners/nail clippers
Laundry bag and detergent
Toothbrush
Disposable slippers or
indoor flip flops
Paper toilet seat sheets
Travel-sized umbrella
Overseas power conversion
plug adapter
Watch/alarm clock
Electronic dictionary
Medicine (your own)
Electronics (PC, laptop, tablet)
Cell phone
Sanitary products, cosmetics, sunscreen, hand mirror, shaver
Pocket tissues/wet wipes
Disposable masks
Powders such as Pocari Sweat (dissolvable)
Canned and sealed foods
Bath towel and face towel
Backpack
Photos of your family, of Japan etc: useful for introducing yourself
and Japan
Hats/sunglasses
Chopsticks
Travel guidebook
Writing utensils and stationary (3-color pens etc)
Athletic shoes and clothing
Clothes for formal situations (e.g. suits) (especially for long-term
studies)
Easily worn clothing (e.g. cardigans and parkers)
Portable sewing supplies
Rubber bands (New York rubber bands are poor quality and will break
easily)
Glasses/contact lenses and cleaners
Things you can purchase while studying
abroad (or you can bring with you)
Hair dryer
Shoes
Shampoo/conditioner etc
Things to bring depending on the season
(can be purchased in New York)
Winter (October to April)
Pocket warmers
Hats
Gloves
Scarves
Heat-tech clothing
Coat
Blankets
Thick socks
Lip balm
Windbreaker
Spring (May to June) and Autumn
(September to October)
Hayfever medication
Clothing that can be easily
layered
Summer (June to September)
Swimwear
Beach sandals
Sunscreen
Folded fan
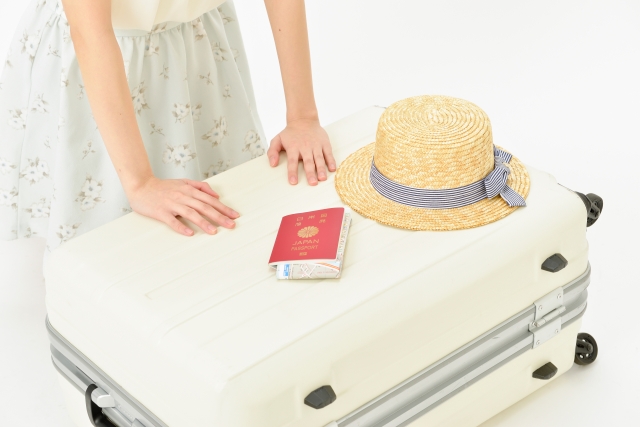
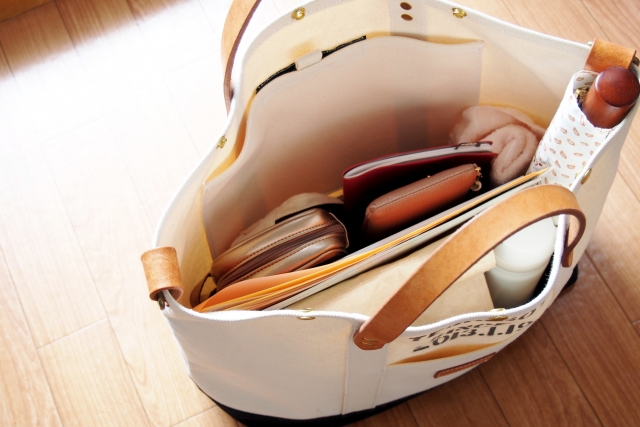
List of Carry-On Baggage on the Plane
Passport
I-20 form (for students traveling on a student visa)
Cash (both Japanese yen and local money): It may be convenient to put these in separate wallets
Credit card: VISA or Mastercard are recommended. JCB, American Express and Diner’s Club Cards are not always accepted
Study abroad insurance: for more details, click here
Bank cards that allow overseas withdrawals: your own cash can be withdrawn from a Japanese bank account. The exchange rate will be applied at the time of withdrawal. For more details, click here
Ballpoint pen and small notebook
Plane ticket
Cell phone: for more details, click here
Computers and tablets: it is recommended that these are not placed in checked-in baggage
Tissues, handkerchief
A copy of your address details
Other things to note:
On long flights, the cabin is very dry. It might be good to bring some lotion or moisturizer.
Depending on the airline, plane cabins can get very chilly. It might be good to bring some light outerwear, like a cardigan.
Make a note of your passport number in a notebook or on your cell phone. This number is required when filling out entry forms like the customs declaration form. Losing your passport causes a lot of issues, so it’s a good idea to just take it out at Immigration.
Make copies of all important documents and credit card information. If these are lost, you will be able to sort everything out without panicking.
Please ensure you check baggage restrictions with your airline. Usually, one bag is around 23kg. Liquids need to be 100ml or less and kept in a transparent sealed bag.
Check the local weather before your arrival. If the weather is going to be bad, it may be useful to put a portable umbrella in your carry-on luggage.
If you have arranged for transport, keep a note of the contact details. If you have any issues or cannot contact the driver, you can contact us without any problems.
Don’t carry too much cash on you. Credit cards are widely used for local purchases. (Preparation of money while studying abroad)